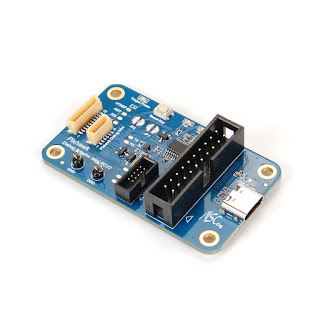
Flashing/debugging/running code at external memory in the memory-mapped mode
STM32 microcontrollers have special capabilities running code directly from external flash. To make it possible STM32 made a special set of instructions called memory-mapped mode where the microcontroller is reading instructions from the external flash. Since to read data from an external flash can take some time there is QSPI protocol witch basically four wires used as SPI MISO (Master Input Slave Output) to make throughput 4x time faster than classical SPI.
Figure 1 - Illustration of STM32H750 connected to W25Q128JV
Recently I've been working on a project where we were porting the PX4 project to STM32H750 witch has 128 KBytes of flash memory and PX4 has needs for more the 1 MBytes. We decide to try to run it from external flash and we succeeded. We needed to move some critical time code into RAM, but basically, most of the code is at the external flash.
The main problem was the question, how to flash and debug code at external flash? I ended up writing my own software for flashing and some scripts for success debugging.
The main problem was the question, how to flash and debug code at external flash? I ended up writing my own software for flashing and some scripts for success debugging.
This way you can debug H750 without pressing the restart or boot buttons.
Here I'll give access to the bootloader and flash for people who are working on the open-source projects.
You will need to send me proof that you are open source contributor (link to your repository that shows that you are contributing) at my email igy1000mb@gmail.com with the board id and I'll send you a file with the key.
If you are a company and you need this contact me for more details.
If you have arrived at this post to flash first stage bootloader over your SP Racing H7 Extreme I'll suggest you don't do it, until you are a very experienced embedded programmer. You will probably end up with an unbootable board. It is a better option to flash IMSSBL and you can have the same functionality. Check this post: https://igor-misic.blogspot.com/2020/10/sp-racing-h7-extreme-imssbl.html
I'll prepare later second stage bootloader for the same board with the same functionality, stay tuned.
So how this works?
This is for Linux developers only (for now).
First, you will need the IMBootloader, and then flash your STM32H750 with it. It will enable USB communication with PC, drivers for W25Q128JV and it will jump to address 0x90100000 in memory-mapped mode.
First, you will need the IMBootloader, and then flash your STM32H750 with it. It will enable USB communication with PC, drivers for W25Q128JV and it will jump to address 0x90100000 in memory-mapped mode.
Second, you will need the IMFlasher. This application will flash an external flash by using USB.
Download link
Steps:
1) First you will need Board ID. Run this command from a terminal:
BOARD ID
"f7106d11b3d96303c2c6f36ebbe4d01a1d73002aa6e510bb899f05859df6ad75"
Send the BOARD ID to my email <igy1000mb@gmail.com> together to link at the project you are working on. I'll send you keys.json file
./IMFlasher.appimage flash 0x90100000 ""
And then connect your board.
You will get output like this:
BOARD ID
"f7106d11b3d96303c2c6f36ebbe4d01a1d73002aa6e510bb899f05859df6ad75"
Send the BOARD ID to my email <igy1000mb@gmail.com> together to link at the project you are working on. I'll send you keys.json file
2) Put the keys.json file in the same directory as IMFlasher
3) Now you can flash your binary to External flash to see if everything is working.
Run this command:
./IMFlasher.appimage flash 0x90100000 "path/to/binary"
You will see the flashing process.
You will see the flashing process.
You can flash to any address you want but it will jump to it only once after flashed. The bootloader is hardcoded to jump to 0x90100000 after the restart. Maybe in some future version, I'll add an option to store the address to jump on.
4) Now you can set up Eclipse. You will need an additional script.
The additional script will make run IMFlasher in the background while the debugger is restarting the board will lunch automatically flashing to external flash. This is what we are trying to achieve with all this.
make debugger_wrapper.sh executable
chmod +x debugger_wrapper.sh


Comments
Post a Comment